Managing Event Location
Setting a Venue (or even a Room of a Venue) as an event's location aids staff in logistical planning and tracking, and provides registrants with useful tools and details. A venue might be a convention center, hotel, business, school, pavilion, or any other setting where an event is held or event attendees can stay.
-
Also see: Setting up Event Accommodations
Note: Location-based tools are not available on events that are configured as virtual. Once the Is Virtual check-box is checked, fields such as Venue and Room will no longer appear.
Jump to section:
Configuring Venues and Rooms
Venues are configured in the Events app > Setup > Venues. Rooms are configured within a venue's record.
-
Click the Add New Venue button. This will launch the Add Venue dialog.
-
In the Name field, enter the text that will display when referring to the venue. This is usually the location's name or a description of it, rather than an address (as address is listed separately). However, an address is also acceptable.
-
You may enter a Description if you'd like to provide further details that will be visible to staff only.
-
Completing the Address fields is optional, but providing an address allows the system to display the location on a map.
-
The system does not come equipped with a venue directory, but it is possible to create one. If doing so, consider whether or not the venue should Show in Directory.
-
-
Click Save to create the venue record.
-
Additional configuration settings will be available on the venue record. Click Edit to open the venue record.
-
Details tab
-
General Info: Edit the Name or Short Description.
-
Addresses
-
Phone Numbers
-
Email Addresses
-
-
Halls/Rooms tab
Rooms are spaces within a venue. They can be designated as event locations, rooms for sessions, or halls for exhibits. To configure a Room:-
Click the Add Room button. This will launch the Add Room dialog.
-
The Venue field is automatically filled with the name of the venue in which the room is being created. This cannot be edited.
-
In the Name field, enter the name or number that is used to refer to the room on venue signage or layout guides.
-
If the room is referred to by a secondary name or number in contract materials, that can be listed in the Description field.
-
Enter the maximum occupancy of the room in the Max Capacity field. This is number of people that should be allowed into the room at one time.
-
If desired, enter the measurements of the room in the Room Dimensions field.
-
Click Save to create the room.
-
-
Events/Exhibits tab
No configuration necessary. Once the venue is put into use, any events or exhibits that take place at the venue will be listed here.
-
Setting an Event's Location
Provided that the event is not marked as Virtual, its location can be set:
-
During the event creation process, or
-
When editing the Event Record, in the Planning tab, under the Location menu option.
Note: Once an event's sessions have been created and assigned to rooms, the event's venue can no longer be changed.
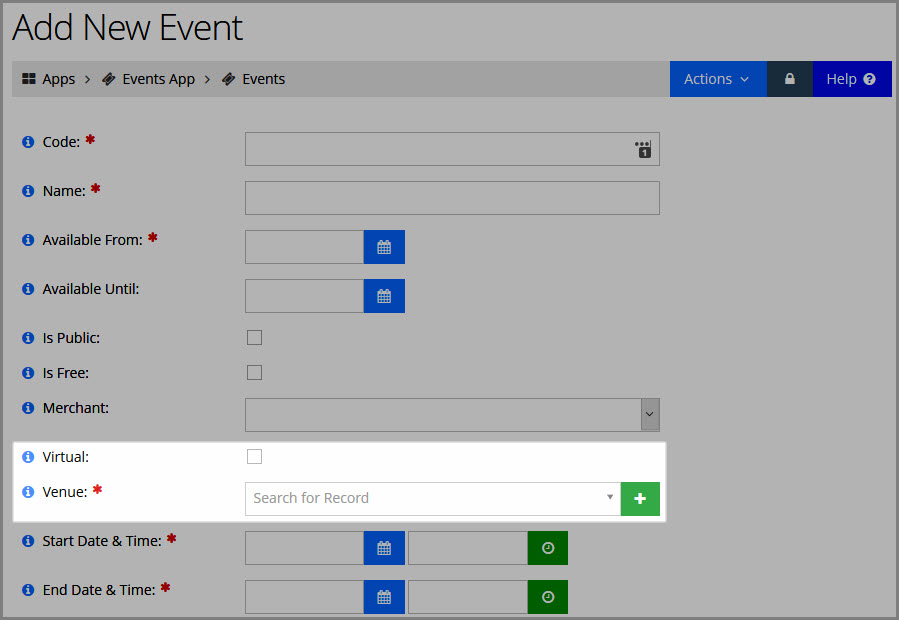
In the Venue field, simply begin typing the name of the venue—if it exists in the system, the option will appear for selection. If the venue does not yet exist, click the Add icon to launch the Add Venue dialog.
Note: If the newly created Venue should have Rooms configured, you will need to navigate to the Venue Record.
If the event is taking place in just one room, select a Room from the drop-down list (available on the Venue Record). The rooms available are related to the venue selected in the Venue field.
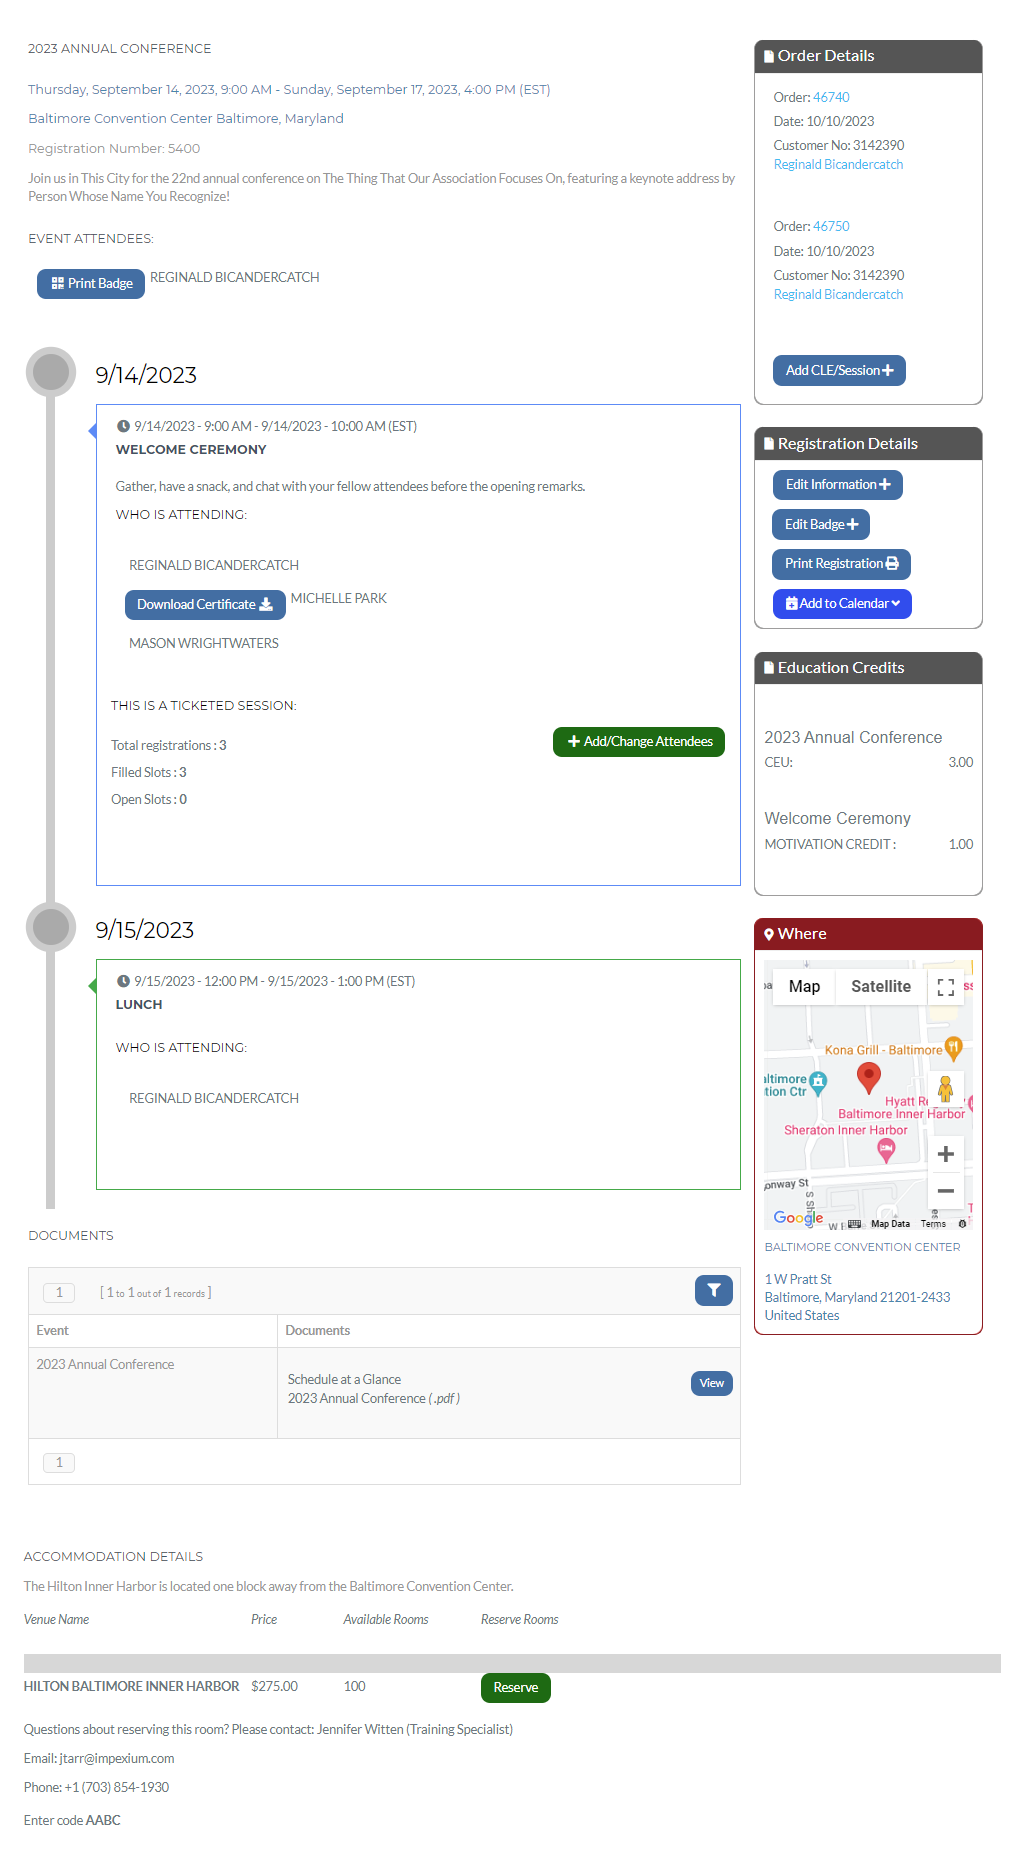
For events with venues configured, registrants will see location details on their Event Purchase Profile. The venue name will be listed near the top, just under the date and time. A map of the venue's location may appear on the right.